अरे यार, क्या आपको भी लगता है कि वर्डप्रेस ब्लॉग बनाना rocket science है?
- मुझे WordPress ही क्यों चुनना चाहिए?
- Step 1: Domain Name और Hosting Choose करें
- Domain Name कैसे चुनें?
- Best Hosting Providers India में:
- 💖 You Might Also Like
- Step 2: WordPress Install करना
- Installation Process:
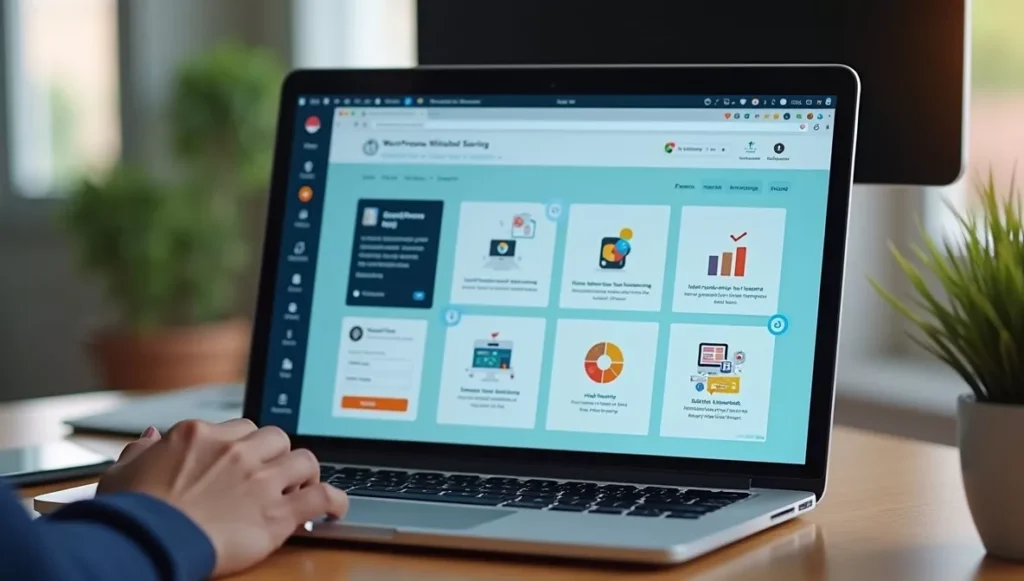
- Step 3: WordPress Dashboard को समझना
- Dashboard Layout:
- Step 4: Perfect Theme Select करना
- Theme Selection Criteria:
- Recommended Free Themes:
- Theme कैसे Install करें:
- ✨ More Stories for You
- Step 5: Essential Plugins Install करना
- Must-Have Plugins:
- Step 6: Basic Settings Configure करना
- General Settings:
- Permalink Structure:
- Reading Settings:
- Step 7: पहला Blog Post लिखना
- Post Writing Best Practices:
- SEO Optimization:
- 🌟 Don't Miss These Posts
- Step 8: Important Pages बनाना
- Must-Have Pages:
- Step 9: Website को Fast बनाना
- Speed Optimization Tips:
- Step 10: SEO के लिए Optimize करना
- On-Page SEO Checklist:
- Technical SEO:
- Advanced Tips और Tricks
- Content Strategy:
- Monetization Options:
- Traffic Generation:
- Common Mistakes और Solutions
- ❌ Mistake 1: Over-designing
- ❌ Mistake 2: Too many plugins
- ❌ Mistake 3: Ignoring mobile users
- ❌ Mistake 4: No backup
- ❌ Mistake 5: Buying expensive tools initially
- Security Best Practices
- Security Measures:
- Troubleshooting Common Issues
- White Screen of Death:
- Website Hacked:
- Too Much Traffic (Good Problem!):
- Growth Strategy
- Month-wise Roadmap:
- FAQs
- Q1: WordPress blog बनाने में कितना पैसा लगता है?
- Q2: क्या मैं free में blog बना सकता हूं?
- Q3: Blog से कितना पैसा कमा सकते हैं?
- Q4: कितने दिन में Google में show होगा?
- Q5: English में लिखूं या Hindi में?
- Q6: Daily posting जरूरी है?
- Q7: Mobile app की जरूरत है?
- Q8: Backup कितनी बार लें?
- Q9: Social media integration जरूरी है?
- Q10: Copyright issues से कैसे बचें?
- Final Words
मैं आपको बताता हूं सच्चाई।
आज से 3 साल पहले मैं भी यही सोचता था।
“यार ये coding कैसे करूं?” “Domain hosting का क्या करूं?” “पैसे waste हो जाएंगे क्या?”
But guess what?
अब मेरे पास 5 successful blogs हैं।
और आज मैं आपको exactly वो बताऊंगा जो मैंने सीखा है।
Step by step। No fluff। Real talk।
मुझे WordPress ही क्यों चुनना चाहिए?
Look।
Internet पर 40% websites WordPress पर बनी हैं।
ये कोई coincidence नहीं है।
WordPress के फायदे:
- Free है (सिर्फ hosting pay करना है)
- Easy to use (coding नहीं चाहिए)
- Themes का भंडार (हजारों free options)
- SEO friendly (Google को पसंद आता है)
- Plugins (हर काम का tool मिलता है)
मैंने Blogger, Wix, Squarespace सब try किए हैं।
Trust me।
WordPress beats them all।
Step 1: Domain Name और Hosting Choose करें
यहां सबसे बड़ी गलती होती है।
People think domain name बहुत important है।
Partially true है।
But hosting ज्यादा important है।
Domain Name कैसे चुनें?
Golden Rules:
- Short रखें (10 letters max)
- .com prefer करें (.in भी चलेगा)
- Numbers avoid करें
- Hyphens न डालें
- Brand friendly बनाएं
Example:
- ❌ my-awesome-food-blog-2024.com
- ✅ foodievibe.com
Best Hosting Providers India में:
- Hostinger – मैं personally use करता हूं
- ₹149/month से start
- Fast servers
- 24/7 support
- Bluehost
- WordPress officially recommend करता है
- ₹199/month
- SiteGround
- Premium service
- ₹349/month
Pro Tip: पहली बार hosting लेते time yearly plan लें। Monthly plans में paise ज्यादा लगते हैं।
💖 You Might Also Like
Step 2: WordPress Install करना
Good news।
अब manually install नहीं करना पड़ता।
सभी hosting companies में one-click WordPress installation है।
Installation Process:
cPanel में जाएं:
- WordPress icon पर click करें
- Domain select करें
- Admin username/password set करें
- Install button दबाएं
Boom।
5 minutes में WordPress ready।
मैं पहली बार manually install कर रहा था।
2 hours waste किए थे।
Ab ये सब automatic है।
Step 3: WordPress Dashboard को समझना
जब आप पहली बार WordPress dashboard खोलते हैं।
Overwhelming लगता है।
Don’t worry।
मैं आपको important sections बताता हूं:
Dashboard Layout:
Left Sidebar में:
- Posts – आपके blog articles
- Pages – About, Contact जैसे static pages
- Appearance – themes और customization
- Plugins – extra features add करने के लिए
- Users – अगर team है तो
- Settings – basic configurations
सबसे important है Posts और Appearance।
Baaki सब later में समझ जाएगा।
Step 4: Perfect Theme Select करना
Theme आपकी website का face है।
लेकिन नए bloggers यहां बड़ी गलती करते हैं।
“Sabse fancy theme चुन लेते हैं।”
Galat है।
Theme Selection Criteria:
✅ Must Have Features:
- Mobile responsive (50% traffic mobile से आता है)
- Fast loading (3 seconds से ज्यादा = visitors भाग जाते हैं)
- SEO optimized
- Regular updates मिलते हैं
- Good support
Recommended Free Themes:
- Astra – मेरी #1 choice
- GeneratePress – Super fast
- OceanWP – Feature rich
- Neve – Modern design
Pro Tip: Paid theme लेने की जरूरत नहीं। Free themes भी professional look दे सकती हैं।
Theme कैसे Install करें:
- Appearance > Themes में जाएं
- Add New पर click करें
- Theme search करें
- Install और Activate करें
Simple।
✨ More Stories for You
Step 5: Essential Plugins Install करना
Plugins WordPress की real power हैं।
लेकिन ज्यादा plugins = slow website।
मैं आपको only essential ones बताता हूं:
Must-Have Plugins:
1. Yoast SEO
- Google में ranking के लिए
- Content optimization में help करता है
2. Akismet Anti-Spam
- Spam comments block करता है
- By default installed होता है
3. UpdraftPlus
- Backup के लिए
- Website crash हो जाए तो restore कर सकते हैं
4. WP Rocket (Paid) या W3 Total Cache (Free)
- Website speed बढ़ाने के लिए
5. Contact Form 7
- Contact forms बनाने के लिए
Installation Process:
- Plugins > Add New
- Plugin name search करें
- Install और Activate
Bas।
Step 6: Basic Settings Configure करना
यहां technical चीजें हैं।
लेकिन important हैं।
General Settings:
Settings > General में जाएं:
- Site Title: आपका blog name
- Tagline: short description (SEO के लिए important)
- WordPress Address: change न करें
- Site Address: same रखें
- Timezone: Asia/Kolkata select करें
Permalink Structure:
Settings > Permalinks में:
Custom Structure select करें:
/%postname%/ये SEO friendly URLs बनता है।
Example:
- ❌ yoursite.com/?p=123
- ✅ yoursite.com/wordpress-blog-kaise-banaye
Reading Settings:
Settings > Reading:
- Front page displays: Latest posts (blog के लिए)
- Blog pages show at most: 10 posts
- Search Engine Visibility: Uncheck करें (important!)
Agar check रखेंगे तो Google में show नहीं होगा।
Step 7: पहला Blog Post लिखना
Finally।
Real content creation का time आ गया।
Post Writing Best Practices:
Title Guidelines:
- Keyword include करें
- 60 characters से कम रखें
- Numbers use करें (जैसे “5 Tips”, “10 Ways”)
- Emotional words add करें
Content Structure:
- Introduction – Problem address करें
- Main Content – Solution provide करें
- Conclusion – Call to action दें
Formatting Tips:
- Headings use करें (H2, H3)
- Bullet points add करें
- Bold important words
- Images add करें (copyright free)
- Internal links दें
SEO Optimization:
Yoast SEO plugin use करें:
- Focus keyword set करें
- Meta description लिखें
- Readability check करें
- Green signal मिले तो publish करें
🌟 Don't Miss These Posts
Step 8: Important Pages बनाना
Blog posts के अलावा कुछ pages जरूरी हैं:
Must-Have Pages:
1. About Page
- अपना introduction
- Why आपका blog follow करें
- Personal touch add करें
2. Contact Page
- Contact form add करें
- Social media links
- Email address
3. Privacy Policy
- Google AdSense के लिए जरूरी
- Legal protection
- Template online mil जाता है
4. Disclaimer
- Affiliate marketing के लिए
- Content responsibility
Page बनाने के लिए:
- Pages > Add New
- Content लिखें
- Publish करें
- Menu में add करें
Step 9: Website को Fast बनाना
Slow website = Dead website।
Google भी fast websites prefer करता है।
Speed Optimization Tips:
1. Image Optimization:
- JPEG format use करें photos के लिए
- PNG transparent backgrounds के लिए
- WebP format best है (modern browsers support करते हैं)
- Size 100KB से कम रखें
2. Caching Plugin:
- W3 Total Cache (free)
- WP Rocket (paid but best)
3. Unnecessary Plugins Remove करें:
- Monthly check करें
- जो use नहीं हो रहे, delete करें
4. Good Hosting:
- Cheap hosting = slow website
- Quality hosting invest करें
Speed Test Tools:
- GTMetrix
- Google PageSpeed Insights
- Pingdom
Target: 3 seconds से कम loading time।
Step 10: SEO के लिए Optimize करना
SEO = Free traffic from Google।
यहां most bloggers fail हो जाते हैं।
On-Page SEO Checklist:
✅ Keyword Research:
- Google Keyword Planner use करें
- Ubersuggest (free version)
- Long-tail keywords target करें
✅ Content Optimization:
- Title में keyword include करें
- First paragraph में mention करें
- Headings में use करें
- Alt text images के लिए
✅ Internal Linking:
- Related posts link करें
- Anchor text meaningful रखें
- 2-3 internal links per post
✅ External Linking:
- Authority sites को link करें
- Sources cite करें
- Credibility बढ़ता है
Technical SEO:
XML Sitemap:
- Yoast SEO automatically create करता है
- Google Search Console में submit करें
Robots.txt:
- WordPress automatically handle करता है
- Manual changes avoid करें initially
Advanced Tips और Tricks
अब मैं आपको वो secrets बताता हूं जो मैंने years की experience से सीखे हैं:
Content Strategy:
1. Consistency is King
- Weekly 2-3 posts minimum
- Same time publish करें
- Calendar maintain करें
2. Long-form Content
- 1500+ words लिखें
- Detail में cover करें
- Value provide करें
3. Trending Topics:
- Google Trends use करें
- Social media monitor करें
- News websites follow करें
Monetization Options:
1. Google AdSense
- Minimum 3 months consistent posting
- Good traffic चाहिए
- Policy follow करें strictly
2. Affiliate Marketing
- Amazon Associates
- Commission Junction
- Products recommend करें जो actually use करते हैं
3. Sponsored Posts
- Brands approach करेंगे
- Traffic बढ़ने के बाद
- Disclosure mention करें
Traffic Generation:
1. Social Media:
- Facebook – Groups join करें
- Instagram – Stories use करें
- Pinterest – Visual content share करें
- LinkedIn – Professional content
2. Email Marketing:
- Mailchimp (free upto 2000 subscribers)
- Newsletter start करें
- Lead magnets create करें
3. Guest Posting:
- Other blogs पर write करें
- Backlinks मिलते हैं
- Network build होता है
Common Mistakes और Solutions
मैंने ये सब गलतियां की हैं।
आप न करें:
❌ Mistake 1: Over-designing
Solution: Content पर focus करें, design बाद में।
❌ Mistake 2: Too many plugins
Solution: Only essential plugins keep करें।
❌ Mistake 3: Ignoring mobile users
Solution: Mobile-first approach अपनाएं।
❌ Mistake 4: No backup
Solution: Daily automatic backup setup करें।
❌ Mistake 5: Buying expensive tools initially
Solution: Free tools से start करें, पैसे आने पर upgrade करें।
Security Best Practices
WordPress secure रखना बहुत important है:
Security Measures:
1. Strong Passwords:
- Minimum 12 characters
- Numbers, symbols include करें
- Password manager use करें
2. Regular Updates:
- WordPress core updates
- Theme updates
- Plugin updates
3. Security Plugins:
- Wordfence (free)
- Sucuri (paid)
- Malware scanning
4. SSL Certificate:
- Hosting provider से free मिलता है
- https:// ensure करें
Troubleshooting Common Issues
Problems आती रहती हैं।
Solutions ready रखें:
White Screen of Death:
- Plugin conflict हो सकता है
- Plugins deactivate करें one by one
- Theme default पर switch करें
Website Hacked:
- Immediately hosting provider को inform करें
- Backup से restore करें
- Passwords change करें
Too Much Traffic (Good Problem!):
- Hosting upgrade करें
- CDN use करें (Cloudflare free है)
- Caching optimize करें
Growth Strategy
Blog बनाना easy है।
Grow करना challenging है।
Month-wise Roadmap:
Month 1-3: Foundation
- Quality content focus करें
- SEO basics implement करें
- Social media presence build करें
Month 4-6: Growth Phase
- Guest posting start करें
- Email list build करें
- Analytics study करें
Month 6-12: Monetization
- AdSense apply करें
- Affiliate marketing start करें
- Products/services offer करें
Year 2+: Scaling
- Team hire करें
- Multiple income streams
- Authority build करें
FAQs
Q1: WordPress blog बनाने में कितना पैसा लगता है?
A: Minimum ₹2000-3000 yearly। Domain (₹800) + Hosting (₹1800) + Premium theme optional (₹2000)।
Q2: क्या मैं free में blog बना सकता हूं?
A: WordPress.com free है लेकिन limitations हैं। Professional blog के लिए self-hosted WordPress better है।
Q3: Blog से कितना पैसा कमा सकते हैं?
A: Sky is the limit। मैंने bloggers को देखा है जो monthly ₹50,000 से ₹5 लाख तक कमाते हैं। Consistency और quality चाहिए।
Q4: कितने दिन में Google में show होगा?
A: 2-4 weeks minimum। Google Search Console में sitemap submit करें faster indexing के लिए।
Q5: English में लिखूं या Hindi में?
A: Audience पर depend करता है। Hindi content में competition कम है, opportunity ज्यादा है।
Q6: Daily posting जरूरी है?
A: Quality over quantity। Better है weekly 1-2 good posts लिखें rather than daily average content।
Q7: Mobile app की जरूरत है?
A: WordPress admin का mobile app है posting के लिए। Website automatically mobile-friendly होगी responsive theme से।
Q8: Backup कितनी बार लें?
A: Daily automatic backup ideal है। Manually weekly तो जरूर लें।
Q9: Social media integration जरूरी है?
A: Absolutely! Social sharing buttons add करें और profiles link करें।
Q10: Copyright issues से कैसे बचें?
A: Images के लिए Unsplash, Pexels use करें। Content original लिखें। Others को properly credit करें।
Final Words
Look।
WordPress blog बनाना सिर्फ technical process नहीं है।
यह आपका digital identity बनाने का process है।
मैंने आपको step-by-step सब कुछ बताया है।
अब action लेने की बारी आपकी है।
Remember:
- Start today – Perfect moment कभी नहीं आता
- Stay consistent – Daily small steps big results देते हैं
- Provide value – Audience को genuine help करें
- Be patient – Overnight success myth है
यह journey easy नहीं है।
लेकिन rewarding है।
3 साल बाद जब आप अपना successful blog देखेंगे।
तब आपको समझ आएगा।
सबसे important बात:
Blog बनाने से ज्यादा important है consistent रहना और quality content provide करना।
Technical skills आ जाएंगी।
लेकिन passion और consistency आपके अंदर से आनी चाहिए।
तो क्या आप ready हैं अपना WordPress blog शुरू करने के लिए?
Comment में बताएं आपका niche क्या होगा।
और अगर कोई specific question है।
पूछिए।
मैं help करूंगा।
Happy blogging! 🚀
